
| WARNING: OUTDATED This page (or sections below) appears to have obsolete content. Wiki maintainers will make it relevant once again soon. |
Introduction[]
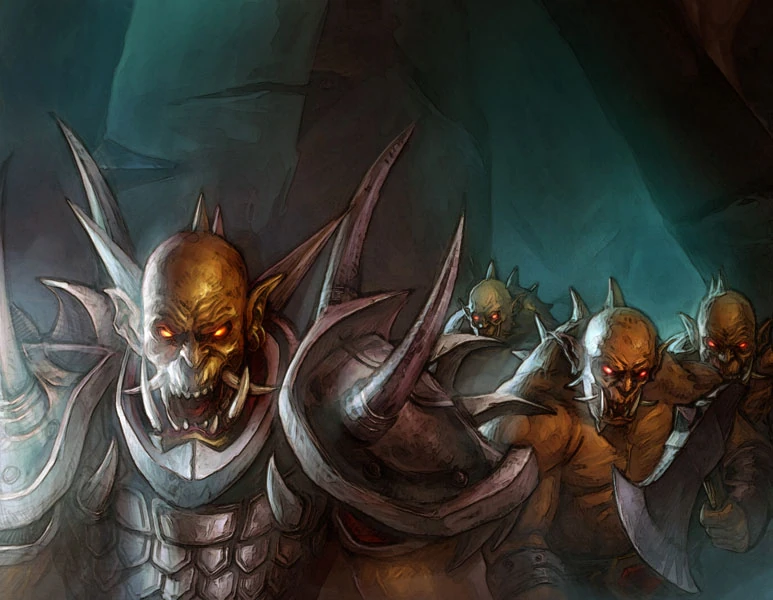
The Fel Horde of Outland was created when Kil'Jaeden the Deceiver persuaded Ner'zhul to accept demonic powers in exchange for territorial expansion and dominance over Outland. Consequently, the fel orcs slaughtered most of the Draenei and constructed two major fortresses on the planet. One was primarily a staging point for assaults on Azeroth (Hellfire Citadel), while the other served as a hub of demonic activity (Black Temple). The Burning Legion directed the Fel Horde to destroy all the human nations and the world. The Dark Portal opens to the southeastern Kingdoms, which is guarded by Kingdom of Stormwind. The Fel Horde of Outland has assimilated the Blackrock Orcs into their army.
Location & Allies[]
- The Fel Horde begins divided into 2 groups, the Fel Horde in Draenor, inside the Dark Portal, and The Dark Horde at Blackrock Mountain, east of Stormwind.
- The Fel & Dark Horde don't have ally, but due the powerful army that he controls, can take all Azeroth by himself.
Pros & Cons[]
- Pros:
- Strong starting army
- Great offensive capabilities
- Access to lots of creep money
- Initially exclusive access to Outland Control Points
- Cons:
- You can lose Magtheridon permanently
- You have to fight two players simultaneously
- You don't have support of an ally
Overview[]
The Fel Horde starts on a Outland, formerly known as Draenor, which is rich in gold and creeps but you are also expected to control the Blackrock clan with its primary base wedged between Khaz Modan and Stormwind. Because the Kingdom of Stormwind is the stronger of the two, you can attack it from two sides. Your primary focus is southeastern Kingdoms cause is the link to Outland, and it's vital that you manage to connect your main forces from Outland with your fortress on Blackrock Mountain.
The Fel & Dark Horde (Teal), is often considered to be one of the most difficult races in Azeroth Wars Legacy Reborn, both because the initial fight can be difficult, particularly when you are facing an enemy team that cooperates well together and because it is difficult to transition well into the middle part of the game on solid footing. It is difficult to both utilize your units well ("Microing"), and to set up bases, infrastructure, build units, and more things to fight two potential factions ("Macroing"). It is generally said that the Fel & Dark Horde (Teal) is a disadvantage the longer the game goes on because playing the race well takes both skill and stamina.
Although the Fel & Dark Horde is one of the more challenging races, it's appealing to some people for its difficulty.
Early Game[]
In the early game, there are many different strategies to employ in the siege of the South Alliance. The best ways as it is seen by most of the players are:
- Attack Stormwind from the south of Darkshire and the north of Lakeshire at the same time, in that way Stormwind cannot defend both sides at the same time without the aid of the Dwarves of Khaz Modan so you need to attack fast before they can organize.
- Send Rend Blackhand's army against the Dwarves to neutralize it before Stormwind comes in his help, also when Stormwind tries to attack Blackrock's Fortress, you can send Kargath's forces to take Darkshire and his base.
Your army must be composed especially by all the Spellcasters, Grunts, Succubus and other units that you think might be of great help.
Throughout the many versions of Azeroth Wars, Fel & Dark Horde's players oscillated from rushing the South Alliance through quick, well timed pushes. Other players have opted to creep all of Outland to get a powerful army but with the risk that your enemy can organize their strategy.
Middle Game[]
In the middle game, is possible to hunt down and crush the remaining of Stormwind and Dwarven resistance after the siege of their main buildings. In that moment you have to make Magtheridon revivable (After Stormwind and Khaz Modan's Siege) before they will try to take him down.
Then you can build a large navy on the west coast of Eastern Kingdom to scout for possible Kalimdor attacks, build a forward base near Stromguarde, research the upgrades of the weapons and spellcasters, organize your army again, and then land and capture islands. It helps tremendously to build bases wherever you can to delay Kalimdor and to stop them from town portaling as easily. After you kill one player your control point count should rise fairly quickly.
Late Game[]
In the late game, you can attack in different places after getting 30-33 control points. If Red and Blue are winning, it can be very good to start sending a boat with peons to Northrend even before Stormwind City is dead. You can build a base in Northrend, teleport there and attack the Frozen Throne even before Red and Blue are finished fighting. If the North Alliance is winning, it is usually a good idea to attack Orange as soon as possible.
In the late game, Teal primarily relies on its incredibly powerful hero group. After so much land area is acquired it is increasingly pointless to build units everywhere; it is better to simply use town portals liberally and reinforce them from existing bases as needed.
Composition of Units[]
Fel & Dark Horde's unit composition varies during the early game. Against Stormwind (Dark Green) and Khaz Modan (Yellow), most people do not build Burning Blademasters (Unlike other races in the beginning). For blitzes, it usually helps to get a large number of necrolytes and melee units. For more patient Teal players, who would rather not rush Dark Green or Yellow, it is usually advisable to have a more ranged/caster composition; though Teal's unit composition varies considerably in the early game.
Control Groups
In the middle game, it is required to build casters, catapults, and even air units to defeat more than 3 players. One set up is:
- Control Group 1: Heroes + Burning Blademasters (researchable at Hellfire Citadel, Black Temple, Blackrock Spire, and Fortresses) + Kazzak the Supreme / War Master Voone
- Control Group 2: Melee units (preferabbly raiders) or Forest Trolls
- Control Group 3: Necrolytes
- Control Group 4: Warlocks (make sure to use unholy armor)
- Control Group 5: 6 Demolishers + 6 Eredar Warlocks
- Control Group 6: Air units
Masteries[]
| Mastery | Icon | Gold | Wood | Extra Requirement | Effect |
|---|---|---|---|---|---|
| Demonic Mastery |  |
350 | 250 | None | Further empowers the demonic forces of the Fel Horde. Improves all demon units attack speed by 10%, damage by 5, health by 10% and health regeneration by 1. |
| Fel blood Mastery |  |
350 | 250 | None | Increases the Health Regeneration by 3 to all your units. Enables you to build one Defiled Fountain of Life. Also grants Kargath a Life Stealing Aura. Gives warlocks the ability to drain the life of enemy units. |
| Fel Strength Mastery |  |
350 | 250 | None | Gives a 10% attack speed bonus and 15% hp bonus to all fel orc units. This upgrade also increases the effectiveness of the ``Charge!`` and the ``Bloodlust`` ability. |
Tiers[]
Researchable on the Throne of Kil'Jaeden in Hellfire Peninsula.
| First Tier Choices | Icon | Gold | Wood | Extra Requirement | Effect |
|---|---|---|---|---|---|
| Tier Choice A:
Spirit of Gore |
|
225 | 50 | None |
|
| Tier Choice B:
Aura of Shadow |
 |
225 | 50 | None | Expands the presence of the Shadow Council, empowering the spellcasters of the Fel & Dark Horde and uncovering old magic.
|
| Second Tier Choices | Icon | Gold | Wood | Extra Requirement | Effect |
|---|---|---|---|---|---|
| Tier Choice A:
Legacy of Fear |
 |
250 | 200 | None | The Fel & Dark Horde invests their efforts into heightening their demonic capabilities in order to conquer the entirety of Azeroth.
|
| Tier Choice B:
Mark of Chaos |
 |
250 | 200 | None | The Fel Horde transitions into a state of supreme bloodlust and madness for conquest.
|
Events[]
Southern Kingdoms -
- Destroying Stormwind and Ironforge makes Magtheridon revivable.
- After destroying Thelsamar and Darkshire, bring any hero to Grim Batol (After destroying the Creeps) to gain Zuluhed the Whacked.
- After destroying Thelsamar and Darkshire, you can train 2 Juggernaut.
Northern Kingdoms -
- If you manage to kill Lord Crowley on Gilneas, you will gain 800 gold and a buff for Kargath of 15 in all his stats.
Heroes, Units and Buildings[]
Heroes:
Demi-Heroes:
 War Master Voone
- Kazzak The Supreme
Special Buildings: (Unbuildable)
- Black Temple
- Hellfire Citadel
- Blackrock Spire
- Throne of Kil'Jaeden
- Kil'sorrow Fortress
- Dimensional Gateway (Limited to 4)
Buildings:
- Great Hall
- Stronghold
- Fortress
- Barracks
- Watch Tower
- Improved Watch Tower
- Boulder Tower
- Improved Boulder Tower
- Spirit Lodge
- Bestiary
- Defiled Fountain of Life
- War Mill
- Pig Farm
- Altar of Storms
- Hellforge
- Shipyard
Elite Units:
- Burning Blademaster (Limited to 6)
- Burning Bladelords (Limited to 6: Obtainable by Second Tier Choice - Option A)
Units:
- Fel Orc Peon
- Fel Orc Grunt
- Fel Orc Raider
- Fel Orc Cavalry
- Demolisher (Limited to 8)
- Infernal Juggernaut (Limited to 2)
- Eredar Warlock
- Necrolyte
- Fel Orc Warlock
- Black Drake (Limited to 6)
- Nether Drake (Limited to 6: Obtainable by Second Tier Choice - Option B)
- Nether Dragon Hatchling (Limited to 8)
- Transport Ship
- Frigate
- Juggernaut
Portal Spawned Units:
- Felguard
- Fel Stalker
- Succubus
- Felguard Overlord
- Infernal
Notes[]
- Use the combination of your spellcasters and melee units. For example: Fel Orc Warlock + Eredar Warlock + Fel Orc Grunt
- Fel Orc Warlock: Gives Unholy Armor to all your units.
- Eredar Warlock: Gives extra Bloodlust to all the Fel Orc Grunts that stacks with their own Bloodlust.
- Fel Orc Grunt: Effective melee unit against a big army, is upgradable, and is cheaper than a Fel Orc Raider or Fel Orc Cavalry.